
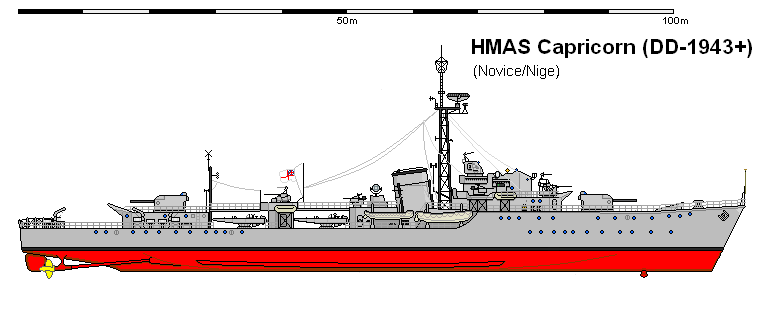
HMAS Greymouth (DD-1942+)
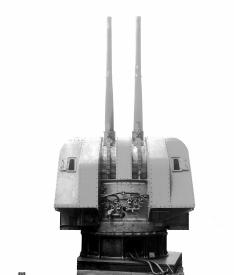
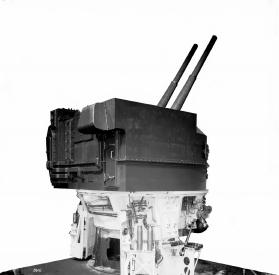
These Emergency War Destroyers were a compromise between the larger Arunta and the smaller Bathurst designs. They proved to be a durable design in two batches, one with the older manual 4.5" turret, and the second batch with the new semi-automatic turret. The light AA armament varied from ship to ship but as refits and updates were fitted the standard AA armament was to be 2 twin Hazemeyer 40mm radar controlled mounts, and 4 twin 20mm mounts. The torpedoes were a standard two quadruple sets.
The RADAR outfits were upgraded and refitted several times with radar control being fitted for the batch 2 main guns. Four of the Mk2's with the larger Southland as leader had a run in with a Japanese cruiser squadron and literally shot them to bits with radar controlled fire in a 20 minute night action.
32 units were laid down from 1940 onwards with the 1st 16 being mk1's and the other 16 mk2's.
| Displacement | 1750 tons std, 2600 tons full load. | Batch 1 | Batch 2 |
| Length | 358 ft | HMAS Greymouth | HMAS Capricorn |
| Breadth | 36 ft | HMAS Melville | HMAS Bunbury |
| Draught | 14 ft | HMAS Childers | HMAS Burnie |
| Machinery | 2 shaft Steam turbines, 40,000shp | HMAS Broome | HMAS Wanganui |
| Speed | 35 knots | HMAS Wellington | HMAS Mandurah |
| Range | 5000 miles at 18 knots | HMAS Mount Gambier | HMAS Orange |
| Armour | nil | HMAS Richmond | HMAS Waitemata |
| Armament | 4 x 4.5" (2x2) 4 x 40mm (2x2) 8 x 20mm (4x2) |
HMAS Parramatta HMAS Shepparton HMAS Penrith HMAS Lismore HMAS Wairarapa HMAS Nowra HMAS Dubbo |
HMAS Coffs Harbour HMAS Albury HMAS Geraldton HMAS Karratha HMAS Port Hedland HMAS Katherine HMAS Derby |
| Aircraft | nil | HMAS Tamworth | HMAS Manukau |
| Torpedoes | 8 x 21" (2x4) | HMAS Otago | HMAS Whyndham |
| Complement | 190 | HMAS Port Macquarie | HMAS Kalgoorlie |
| Notes | HMAS Mildura | HMAS Port Augusta |
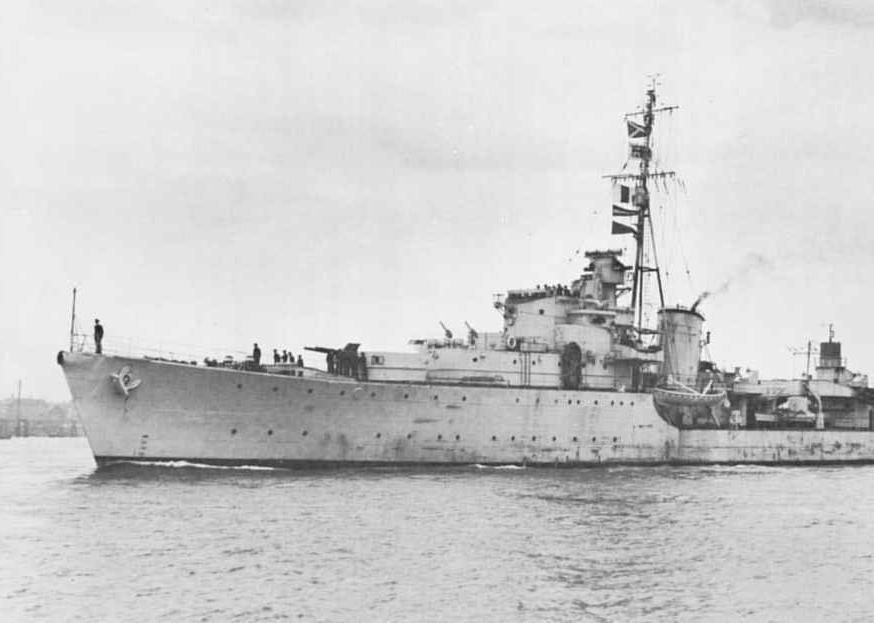
Note single 20mm forward, still waiting for the 40mm Hazemeyer mount to be fitted