In Australis, 3 ships armed with 12" guns were either completely or partially disarmed, one to become an aircraft carrier (see Van Diemen) and the others to become an ADV and CVL (see Tasmania & Manawatu). This gave the Australis Navy 14 twin turrets with modern (1910+) guns in them. The question that arose was what to do with them. The turrets could be used to make new ships with 8-10 gun armaments. This was raised as a possibility as the Royal Navy was pushing a reduction in the London Treaty (1930) battleships to 12" main guns and a reduction in displacement. The Australians were against these reductions as the minimum armed ships they would be fighting against in the Japanese Navy were armed with 14" guns and decent armour. By treaty the Australis Navy could not build any new capital ships before 1930 and there was no way that they wanted to be restricted to 12" guns, they were already updating and improving 15" designs that would be able to match the Japanese Nagato type battleships. The other thing that made using the spare turrets for capital ship production is that though there were 14 turrets, eventually, the first seven were available with the conversion of the Van Diemen in 1924, the other seven came from four turrets from Tasmania and Manawatu in 1925-26, then the final three from Manawatu, when that ship was converted to a CVL in 1936. So only two ships could have been started upon in 1930 with eight or ten gun main armaments.
Australis had not constructed any of the monitor type vessels that had proved so successful in the North Sea and Mediterranean. At that time there had been no need, the Japanese had not been considered as a possible enemy till the late 1920's when the Japanese started accusing the Western powers of marginalising them, and cheating them out of their fair share of the German Pacific possessions. It was at that stage that Australis had to start looking at what might be needed to not only protect the Commonwealth Pacific possessions but also retake any that might be lost to the Japanese in a war. It was beyond the capabilities of Australis to fortify the Pacific possessions, but it could build some monitor type vessels that could be placed at the Pacific possessions to act as mobile floating fortifications, and when it was time to attack the enemy the ships could get close into shore and pound the enemy from close range.
What to build was the next problem. Looking at the one turret, two gunned ships built by the Royal Navy, it was noted how far they had to travel and the speed of the ships. In the Pacific the distances were huge and the ships needed to be fast enough to move between the island groups at a reasonable rate. It was thought that the Australis Navy would be able to work with the US Pacific Fleet in these actions, and that the ships to be built should be fast enough to keep up with the 'fleet' speed at 20-22 knots. The Australis Navy had the boundaries of what they wanted to build, they then needed to get down to the specific designs. The first ship was to be laid down in 1927 for completion in 1928-29. So lets see what they came up with.
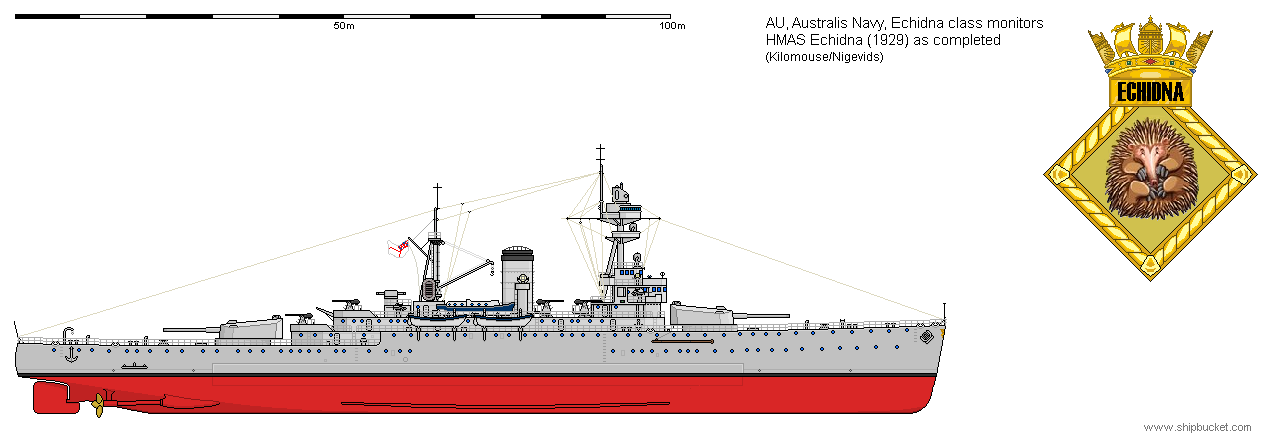
What was decided on was a pre-dreadnought style ship with weaker side armour but heavier deck armour. Also the heavy secondary guns of the pre-dreads were deleted and only the heavy and light AA were placed aboard. The ships had a well balanced look compared to the monitors in the Royal Navy. Two pairs were built using eight of the turrets completing in 1929-1931. A final ship of the class was laid down in 1936 and completed in 1938. The four remaining twin 12" turrets were incorporated in the batteries protecting the entrance to Darwin harbour.
.png)
With the outbreak of the European war, the Australis Navy sent three of the Echidna Class to the Mediterranean to relieve some of the British monitors there that would be transferred to the English Channel, and North Sea areas where they could be used against the German continental troops. With the quick and shocking defeat of the French and the sudden entry into the war of the Italians, the Mediterranean became 'hot'. The Commonwealth forces took to the Italian Armies in North Africa, and just rolled them up. The Italian troops had no stomach for the fight. Hundreds of thousands were captured. It was not an uncommon sight to see 5,000 to 10,000 captured Italian troops, guarded by only two or three men. The three Echidnas played their part, shelling any concentrations of Italian troops within range of their guns. Each time the Echidnas arrived back at Alexandria, more updates and refit parts would be waiting for them. The electronics were especially kept up to date as air power became a greater and greater threat to the ships acting close to shore and the air bases there. All good things come to an end, and the attack into the Balkans of the German troops in support of the Italian incursion into Albania opened up a new front. Churchill with his Balkan obsession plucked the best troops out of North Africa and sent them to help the Greeks. HMAS Quoll was sent with them. The Quoll operated in support of the troops for precisely six days, after which Stukas and JU-88's of Fliegerkorps X, attacked the support ships sinking the Quoll and two destroyers in a well coordinated attack. Only days later other units of Fliegerkorps X caught and crippled HMS Illustrious taking that ship out of action for many months. Fliegerkorps X was the Germans anti-shipping specialists, and their entry into the Mediterranean conflict changed things in favour of the Axis forces.
December 1941 and the war becomes global with the strike by the Japanese Navy at Pearl Harbour and the incursions by Japanese troops into South-East Asia. Australia recalls some of its forces from the Middle East to help stop the Japanese. Bandicoot and Wombat return to Australian waters. Wombat and Bandicoot are routed to the Straits of Malacca where the two monitors could anchor the western side of the troops facing the Japanese who were marching their way down the peninsula. The eastern side was a no go zone after Force Z had come to such a disastrous end. The taking of the airfield at Khota Bahru made it even more difficult to organise a defence line to hold the Japanese. The Australian troops from the Middle East were very experienced and put some backbone into the defensive lines. Australian Gloster Griffon fighters proved a match for the Zeros but the Allied bomber aircraft in theater were no match and got hammered if they were caught. Both Wombat and Bandicoot were receiving damage as the Japanese tried to sink the pair that were doing a magnificent job of holding up the Japanese advance down the coastal road. The 12" guns had a 26,000 yard range and were able to control that 12-13 mile area and deny it totally to Japanese motorised and mechanised units so only the Japanese infantry could infiltrate slowly down the coast. Near miss and splinter damage on both ships slowly took there toll and both ships were recalled to Singapore for patching to get them both back into action. Events overtake the repairs with a major breakthrough of the Japanese through the Allied lines. Kuala Lumpar falls and the hurried defense line across Johor barely holds, but gives the troops on Singapore a chance to dig in ready for a prolonged siege. The ABDA Naval forces around the Java Sea are defeated in Battle, the whole theater is collapsing fast. Time for yet another retreat and evacuation. All civilian ships in and around Singapore are filled with evacuees and sent off to Australis. The Navy continues to try to hold open the Sunda Strait to allow the continued evacuation of ships, but not for much longer. Four Japanese cruisers and half a dozen destroyers, attack and clear the strait of Allied forces. To get any other ships out of Singapore and into safer waters is going to take a major battle. The final forces to try and escape the Japanese net are gathered in the Singapore Roads while the Australis Navy gathers a battle fleet at Darwin to force the straits and allow the bottled up ships out. The three Australis carriers have 130 aircraft aboard, and it is that firepower that clears the straits to allow the ships from Singapore to escape. The ships from Singapore had to get there first.
Fifteen civilian ships from 1000 ton coasters to 15,000 ton cargo liners were the convoy for which the escort was one heavy and one light cruiser, the two monitors, six destroyers, and four escorts. Leaving Singapore the convoy headed southwest down the Karimata Strait between Borneo and Sumatra till the ships could turn south for the Sunda Strait. The Australis battlefleet was held by orders, south of the Sunda Strait. Its airpower could project out to the other side of the Strait but there was a large area where the convoy would be on its own. Australis destroyers and cruisers held the strait backed by airpower. The Japanese forces kicked out of the strait had gone north and joined up with another force of cruisers and destroyers. The Japanese now had three heavy and three light cruisers and ten destroyers. A cruiser and two destroyers had continued north after receiving heavy damage from the Australis air attacks. Two cruisers and two destroyers had been sunk at Sunda strait. The scene is set.
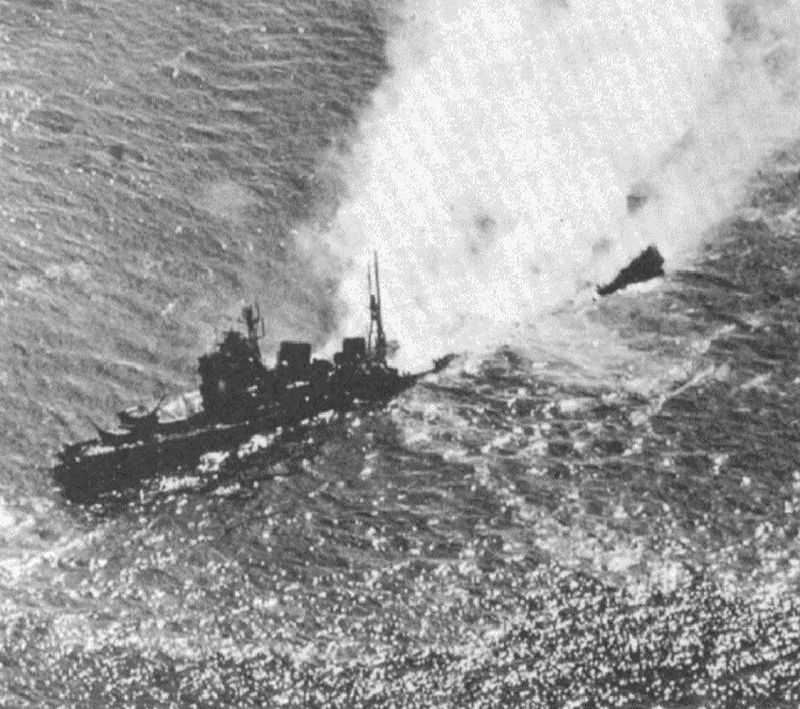
The exact position is known to everyone, the Japanese have been harrying the ships with air attacks from airfields in Borneo. These attacks were not as bad as they could have been as the Japanese had not had time to consolidate its taking of Borneo and fuel and ordnance for the aircraft was scarce and would remain so till tankers with fuel and merchantmen with stores could be arranged. The newly combined Japanese cruiser force is sent to intercept. Long range reconnaissance aircraft from the Australis fleet keep tabs on the Japanese cruiser force and keep the convoy informed of its whereabouts. There would be no surprises on either side. The Japanese had the advantage not just in ships but also in tactical terms. The Allied forces were tied to the convoy as they had to keep the Japanese far enough away to stop the Japanese being able to fire on the merchantmen. For the Allies the 'cruiser' line was limited to the 20 knots of the two monitors, but the Senior Captain aboard the US heavy cruiser knew he needed those ships firepower to have any chance against the Japanese. 34,000 yards and the forces were in sight of each other. Spotter planes are launched from both sides but the Japanese spotters have to run the gauntlet of the Australis long range reconnaissance aircraft, the Whirlwind II. These big twin engined fighters shoot the Japanese spotter aircraft out of the sky. The Allied spotters have a clear field. 30,000 yards and the Japanese open fire. Chances of a hit, minimal. Distance and spread of shot just too great at that range. Being under fire, even though you know your chances of being hit are small is still an uncomfortable feeling. The US cruiser opens fire at 28,000 yards and its salvoes start to achieve hits and near misses after the third salvo as the spotters bring the shells onto the enemy. At 25,000 yards range the other Allied ships open fire with spotter assistance. The light cruiser is happy, the Japanese light cruisers it is firing at are still out of range for another three thousand yards. Wombat and Bandiccoot get a heavy cruiser each and are firing well. Having come from the Med there gunnery ranging radar is right up to date, and coupled with the spotter assistance, hits are achieved regularly. The big 12" shells go straight through any armour the Japanese cruisers have and explode deep in the ship. Two such hits from one salvo wreck A, B and C, turrets of one of the cruisers, opening up the ship to the waterline, forcing the ship to pull out of the line. The Bandicoot switches targets to the second of the light cruisers and hits it twice in quick succession, a gout of steam from a boiler hit and another Japanese cruiser hauls out of the line. Back to evens. The US Captain was well aware of the Japanese Long Lance 24" torpedoes and had been changing course regularly to try and fox the firing solutions. Last ship in the line, HMAS Perth, got unlucky, the last torpedo of a shoal of dozens of torpedoes struck the stern of the ship, blowing away the rudder and twisting the prop shafts. The Perth was helpless, speed dropping away and spinning with the tide in the Straits. The Perth kept firing, but the torpedoes that would sink the ship had already been fired and were on their way. Two further torpedo hits proved too much and the Perth slowly rolled to starboard and went under. It was the 12" guns of the monitors that made the difference. Firing at the two remaining enemy cruisers, three hits on one and four on the other and both ships were forced to withdraw. The remaining cruiser also had damage from the 8" guns of the US cruiser and withdrew as well the Admiral aboard signaling a withdrawal of the Japanese forces. The Admirals cruiser fired its last bank of torpedoes on the turning away. A shot in the dark. One out of four torpedoes hit the USS Houston. An unlucky hit right on the join between watertight compartments, flooding the forward part of the ship and giving the damage control parties major headaches. Speed was reduced and counter flooding instituted. None of the three remaining big Allied ships was undamaged, but all were still firing all their main guns while the Japanese could not do that.
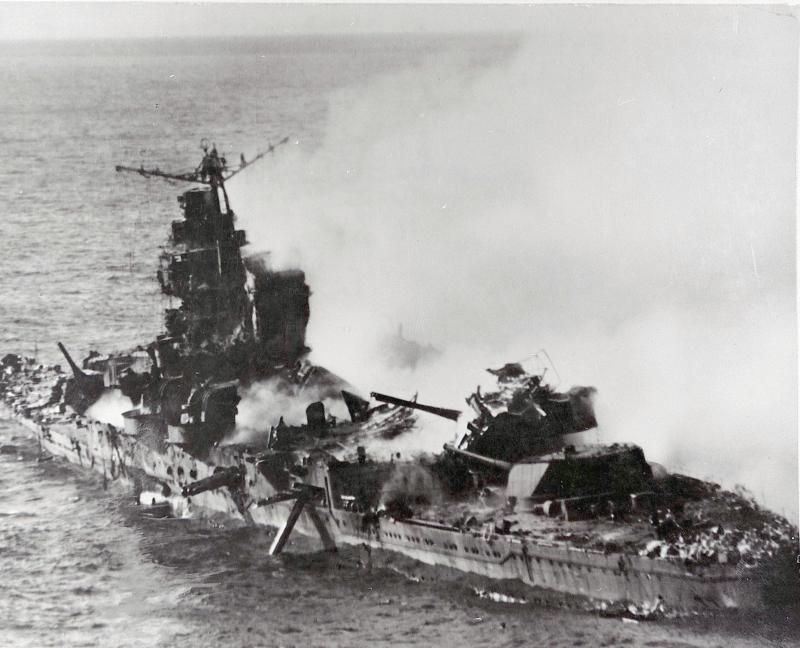
_escorting_convoy_1942.jpg)
Houston and convoy in Karimata Strait.
The Japanese Admiral decided on one last throw of the dice and transferred his flag to one of the destroyers and gave his orders for a night attack on the Allied convoy. He should have known better. The Allied Radar watched him coming and at 25,000 yards opened fire on the Japanese ships. After four hits had crippled two destroyers and the Admiral had been killed, the remaining Captain D ordered a withdrawal, for good this time. Only two ships of the civilian convoy had been lost to air attack. One of the escorts had put itself between a stray torpedo from the battle and the hospital ship (14,000 ton cargo liner). A destroyer disobeyed orders and stopped to pick up survivors from the escort. One being the Lieutenant Commander in command who was awarded the Victoria Cross for his selfless act of bravery. One final loss marred the Allied victory, the Houston, while passing through the Sunda Strait, the strained bulkhead gave way flooding the boiler room and causing a list that it could not recover from. The remaining crew were taken off and a torpedo from one of the destroyers sunk that gallant ship. So ended the Battle of the Sunda Strait.
In retribution the Japanese Strike Fleet with Admiral Nagumo's six carriers burst through the Sunda Strait and went for Darwin, hoping to catch the Australis fleet in harbour as they had done with the American Pacific fleet at Honolulu. The Australis Navy knew they were coming and the fleet based on Darwin was away to the west with only a few ships left in harbour. One of these was the Bandicoot who was still repairing damage from the Sunda Strait battle. Half a dozen bomb hits broke the ships back and the Bandicoot was declared a constructive loss. The ship was stripped of its fittings with the rest of the wreck being towed out and dumped on a sand bar. The wreck was finally broken up in 1946. The next time Thylacine (Tasmanian Tiger) is at Darwin (just a month or so later) all the electronics stripped out of Bandicoot would be fitted to the "Tiger".
Of the remaining three ships, one more, the Echidna itself would be lost to enemy action, supporting the ground troops on Guadalcanal. Echidna received three torpedo hits from a Japanese submarine, and capsized in shallow water, the wreck is still there today, appearing and disappearing with the tides. Thylacine and Wombat went through the rest of the Island hopping campaigns, tasked to the Shore Fire Support group. Two little 12" monitors acting with the 25,000 to 35,000 ton American battleships with 14" and 16" guns. Both ships received recognition and battle stars from the US Navy for their efforts.
What 12" shell hits do to a so called 'heavy' cruiser. Might as well been made out of tinfoil.